Expert Guide to Installing Hinges: Detailed Tips & Tricks
Installing hinges might seem like a straightforward task, but achieving a flawless and long-lasting installation requires attention to detail and the right techniques. Whether you’re a DIY enthusiast or a professional, this comprehensive guide will walk you through every step of the process, offering practical tips, tricks, and expert advice. By the end of this article, you’ll be equipped with the knowledge to install hinges with precision and confidence.
Understanding Hinges: Types and Applications

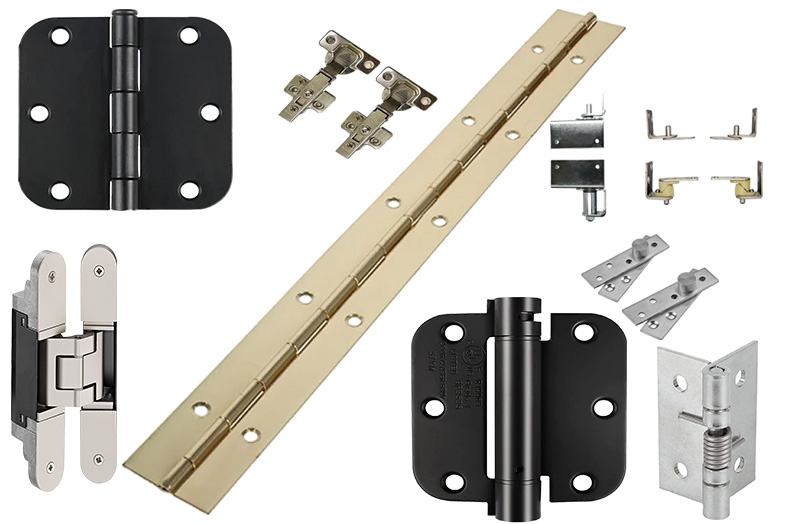
Before diving into the installation process, it’s essential to understand the different types of hinges available and their specific applications. Hinges vary in size, material, and design, each suited for different purposes. Here’s a quick overview of common hinge types:
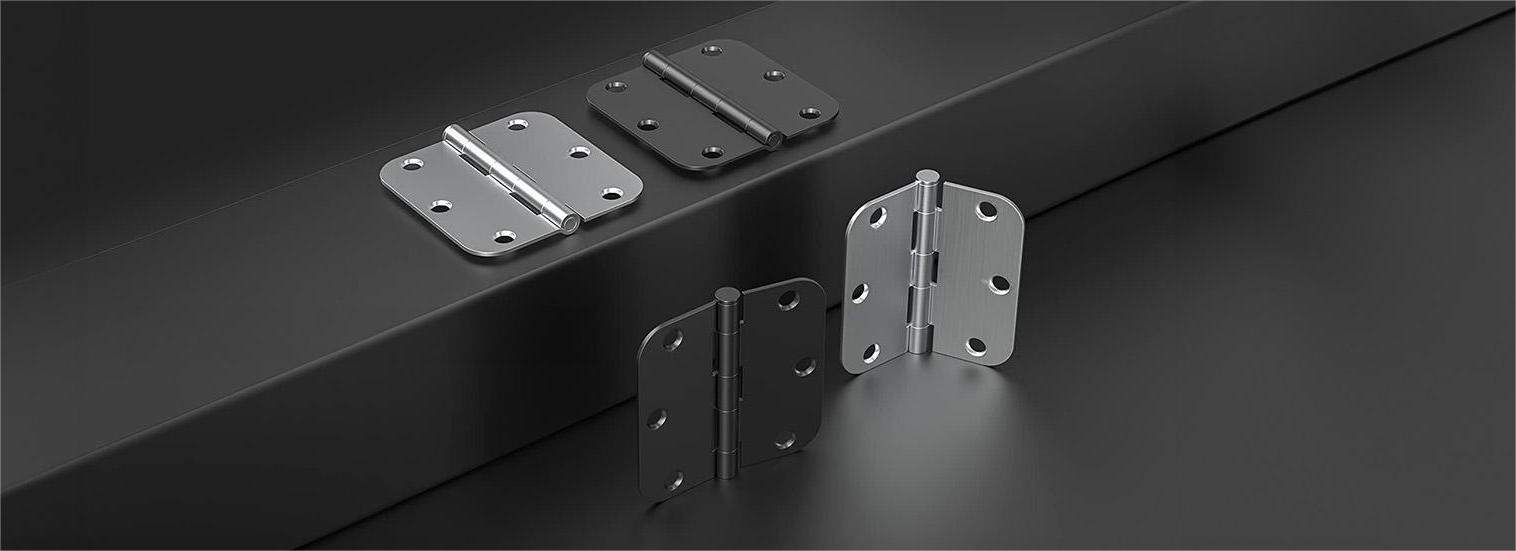
Butt Hinges: These are the most common type of hinges used in doors, cabinets, and furniture. They consist of two rectangular metal plates with interlocking knuckles connected by a pin.
Continuous Hinges (Piano Hinges): These long hinges run the entire length of the door or lid, providing support and stability. They are ideal for heavy or wide doors.
Concealed Hinges: Often used in cabinetry, these hinges are hidden from view when the door is closed, offering a sleek and modern look.
European Hinges: These are a type of concealed hinge commonly used in frameless cabinetry, providing full adjustability and a clean aesthetic.
Pivot Hinges: These hinges are used in specialty applications like heavy doors or gates, allowing them to pivot on a single point.
Spring Hinges: These self-closing hinges are often used in doors that need to close automatically, like in commercial applications.
Preparing for Installation: Tools and Materials

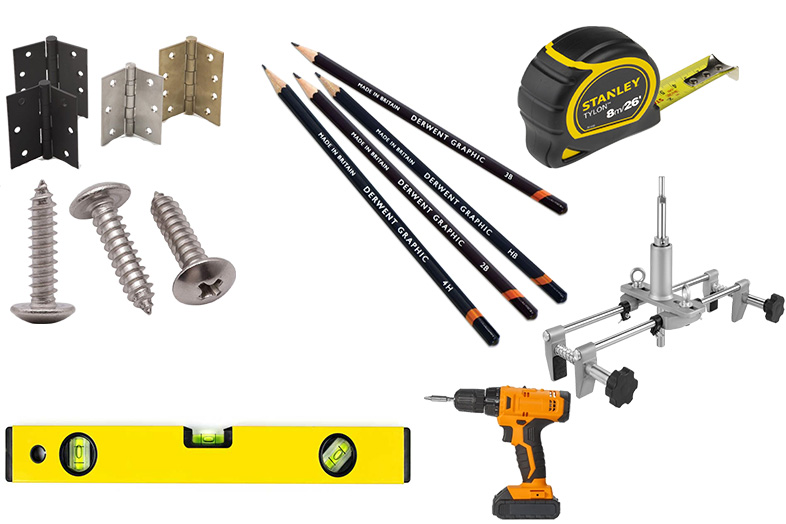
To ensure a successful hinge installation, gather all necessary tools and materials before beginning. Here’s a checklist:
Hinges: Ensure you have the correct type and size of hinges for your project.
Screws: Use screws that match the hinge finish and are the correct length to secure the hinge without penetrating through the door or frame.
Screwdriver/Drill: A manual screwdriver or power drill with appropriate bits will make the job easier.
Chisel: A sharp chisel is essential for mortising (cutting a recess) the hinge into the door or frame.
Tape Measure: Accurate measurements are critical for proper hinge placement.
Pencil: Mark your measurements with a pencil to guide your cuts and screw placement.
Level: Ensure your hinges are aligned correctly with a spirit level.
Mortise Jig: If you’re installing multiple hinges or working on a large project, a mortise jig can save time and ensure uniform cuts.
Wood Glue: Optional but useful for reinforcing the screw holes.
Step-by-Step Installation Guide

Step 1: Measuring and Marking Hinge Placement
Accurate measurements are crucial for hinge placement. Follow these steps:
Determine Hinge Location: For doors, hinges are typically placed 5 inches from the top and 10 inches from the bottom. For cabinets, position the hinges evenly along the edge.
Mark Hinge Outline: Use a pencil to trace around the hinge, marking where the recess (mortise) will be cut. Ensure the hinge is flush with the edge of the door and frame.
Check Alignment: Use a level to ensure the marks are perfectly aligned. Misaligned hinges can cause the door or cabinet to hang unevenly.
Step 2: Cutting the Hinge Mortise
Creating a mortise for the hinge ensures a flush fit and smooth operation. Here’s how to do it:
Score the Outline: Using a utility knife, score along the pencil marks to create a clean edge for the mortise.
Chisel the Mortise: Position the chisel at the edge of the scored outline and tap it gently with a mallet to begin removing wood. Work carefully, removing small amounts at a time until the mortise is the correct depth (usually the thickness of the hinge leaf).
Smooth the Mortise: Once the bulk of the wood is removed, use the chisel to smooth and flatten the mortise. The hinge should fit snugly without any gaps.
Test Fit the Hinge: Place the hinge in the mortise to ensure it sits flush with the door or frame. Adjust as needed by chiseling away any high spots.
Step 3: Drilling Pilot Holes
To prevent the wood from splitting when inserting screws, it’s important to drill pilot holes. Follow these steps:
Position the Hinge: Place the hinge in the mortise and align the screw holes with the pencil marks.
Mark Screw Holes: Use a pencil to mark the center of each screw hole on the door or frame.
Drill Pilot Holes: Select a drill bit slightly smaller than the screw diameter and drill pilot holes at each mark. Drill straight and to the correct depth (about 2/3 the length of the screw).
Step 4: Installing the Hinge
With the mortise cut and pilot holes drilled, you’re ready to install the hinge:
Insert Screws: Align the hinge with the pilot holes and insert the screws by hand. Start with the center screw to ensure the hinge stays in place, then install the remaining screws.
Tighten Screws Evenly: Tighten each screw gradually, alternating between them to keep the hinge aligned. Avoid over-tightening, as this can strip the screw holes or distort the hinge.
Check Operation: Open and close the door or cabinet to ensure smooth operation. If the hinge binds or the door doesn’t hang correctly, check for misalignment and adjust as needed.
Step 5: Finishing Touches
Once the hinges are installed, finish the job with these final steps:
Check for Gaps: Ensure there are no gaps between the hinge leaf and the door or frame. Gaps can cause the hinge to operate poorly and lead to long-term issues.
Test Door Alignment: Open and close the door several times to ensure it operates smoothly and doesn’t bind. The door should hang evenly and remain in the desired position without swinging open or closed on its own.
Reinforce Screw Holes: If the screw holes feel loose or the wood is soft, apply a small amount of wood glue to the holes before inserting the screws. This provides extra holding power and prevents the screws from loosening over time.
Common Mistakes to Avoid
Even with careful planning, mistakes can happen during hinge installation. Here are some common pitfalls to watch out for:
Incorrect Hinge Size: Using hinges that are too small or too large for the door can lead to alignment issues and poor operation. Always match the hinge size to the door or cabinet.
Misaligned Hinges: Failing to align the hinges correctly can cause the door to hang crookedly or bind during operation. Use a level and measure carefully to avoid this issue.
Over-tightening Screws: Tightening screws too much can strip the screw holes or warp the hinge. Tighten screws just enough to secure the hinge without damaging the wood.
Skipping Pilot Holes: Failing to drill pilot holes increases the risk of splitting the wood, especially with hardwoods. Always drill pilot holes before inserting screws.
Not Mortising Hinges: If you skip the mortising step, the hinge won’t sit flush with the door or frame, leading to gaps and poor operation. Always mortise hinges for a professional finish.
Advanced Tips for Professional Results
For those seeking a perfect installation, consider these advanced tips:
Use a Mortise Jig: A mortise jig can save time and ensure uniform cuts, especially if you’re installing multiple hinges. It’s a valuable tool for achieving professional results.
Reinforce Weak Areas: If you’re installing hinges on an old or softwood door, consider reinforcing the screw holes with wood glue or installing longer screws for added strength.
Adjust Hinges for Alignment: Some hinges, like European hinges, allow for fine adjustments after installation. Use these features to ensure perfect alignment and smooth operation.
Consider Screw Length: Ensure the screws are long enough to hold the hinge securely but not so long that they penetrate through the door or frame.
Use High-Quality Hinges: Investing in high-quality hinges made from durable materials like stainless steel or brass ensures longevity and smooth operation, especially in high-traffic areas.
Conclusion
Installing hinges may seem like a straightforward task, but achieving a professional finish requires attention to detail, the right tools, and a methodical approach. By following the tips and tricks outlined in this guide, you can confidently install hinges that will stand the test of time. Remember, the key to a successful hinge installation is precision and patience, ensuring that your doors, cabinets, or gates operate smoothly and look great for years to come.
With this expert guide, you now have all the knowledge needed to tackle your next hinge installation project. Happy installing!


