Expert Tips for Using a Hair Dryer Effectively
Using a hair dryer might seem like a straightforward task, but achieving professional results at home requires more than just pointing the nozzle at your hair. Whether you’re aiming for a sleek, straight look, voluminous curls, or simply drying your hair quickly, the right techniques and tools are essential. This guide will walk you through expert tips and methods to make the most out of your hair dryer, ensuring you achieve the desired results while maintaining the health of your hair.
1. Choosing the Right Hair Dryer

The foundation of effective hair drying begins with selecting the right hair dryer. Not all dryers are created equal, and the features that suit one hair type may not be ideal for another.
Ⅰ. Consider Your Hair Type
Fine Hair: A hair dryer with adjustable heat settings and a lower wattage is ideal to avoid excessive heat that can damage thin strands.
Thick Hair: Opt for a high-wattage dryer with a powerful motor to speed up drying time.
Curly Hair: Look for a dryer with a diffuser attachment to evenly distribute heat and reduce frizz.
Ⅱ. Important Features to Look For
Ionic Technology: Helps reduce frizz by breaking down water molecules, leading to faster drying.
Ceramic or Tourmaline Coating: These materials distribute heat evenly, preventing hotspots that can damage hair.
Cool Shot Button: Helps set your hairstyle in place by sealing the hair cuticle after drying.
Multiple Heat and Speed Settings: Allow for customized drying depending on your hair type and the style you want to achieve.
2. Pre-Drying Preparation
Before you even pick up your hair dryer, preparation is key to ensuring the best results and minimizing damage.

Ⅰ. Towel Drying
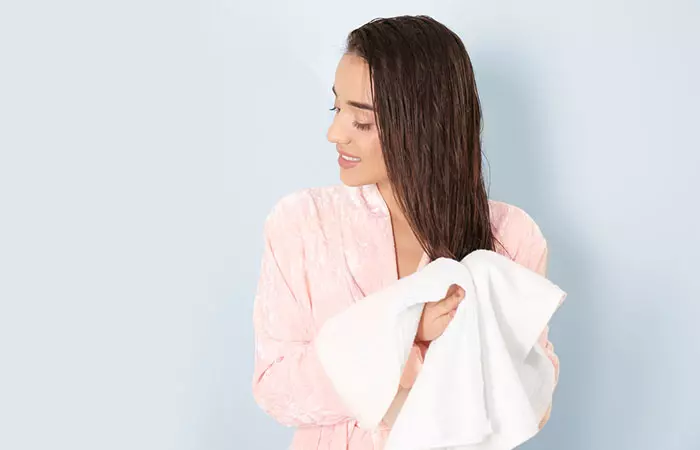
After washing your hair, gently pat it dry with a microfiber towel. Avoid rubbing, as this can cause frizz and breakage. Microfiber towels are more effective at absorbing moisture without roughing up the hair cuticle.
Ⅱ. Heat Protectant
Always apply a heat protectant spray or serum to your hair before drying. These products create a barrier between your hair and the heat, reducing the risk of damage.
Ⅲ. Detangling
Use a wide-tooth comb or a brush designed for wet hair to detangle your hair. Starting from the ends and working your way up helps prevent breakage.
3. Drying Techniques for Different Styles
The way you use your hair dryer will greatly affect the final outcome. Below are methods tailored to various styling goals.
Ⅰ. Achieving a Smooth, Straight Look
Step 1: Section your hair. Divide your hair into at least four sections, more if your hair is thick. Clip the sections you’re not working on out of the way.
Step 2: Use a concentrator nozzle. Attach the concentrator nozzle to your dryer to direct the airflow precisely where you need it.
Step 3: Blow dry with a brush. Start at the roots and work your way down. Use a round brush for volume or a flat brush for a sleeker finish. Pull the brush through your hair as you follow it with the dryer.
Step 4: Finish with a cool shot. Once each section is dry, blast it with cool air to set the style and add shine.
Ⅱ. Creating Volume
Step 1: Blow dry upside down. Flip your head over and dry your hair this way to lift the roots and create volume.
Step 2: Use a volumizing product. Mousse or root-lifting spray can be applied to the roots before drying for added lift.
Step 3: Focus on the roots. When drying, aim the airflow at the roots to lift them as they dry.
Ⅲ. Enhancing Natural Curls
Step 1: Use a diffuser attachment. A diffuser helps distribute the air evenly, reducing frizz and enhancing curl definition.
Step 2: Dry on low heat and speed. High heat can cause curls to lose their shape, so keep the settings low.
Step 3: Scrunch as you dry. Gently scrunch your hair with your hands while drying to encourage curls to form.
4. Protecting Hair from Heat Damage
One of the biggest concerns with using a hair dryer is the potential for heat damage. Following these tips can help mitigate that risk.
Ⅰ. Use the Right Temperature
Low to Medium Heat: Suitable for fine or damaged hair.
Medium to High Heat: Best for thick, coarse hair, but always start on a lower setting and increase only if necessary.
Cool Setting: Ideal for setting styles and reducing frizz.
Ⅱ. Keep the Dryer Moving
Never hold the dryer in one spot for too long. Constant movement ensures even drying and prevents overheating any part of your hair.
Ⅲ. Maintain a Safe Distance
Hold the dryer at least six inches away from your hair to prevent excessive heat exposure.
5. Post-Drying Care
After drying, proper care is essential to maintain your style and the health of your hair.
Ⅰ. Finishing Products
Depending on your hair type and style, you may want to use serums, oils, or sprays to add shine, tame flyaways, or lock in your style.
Ⅱ. Regular Maintenance of Tools
Clean your hair dryer regularly by removing lint from the filter. This ensures it operates efficiently and lasts longer.
6. Common Mistakes to Avoid
To ensure the best results, steer clear of these common hair drying errors.
Ⅰ. Drying Soaking Wet Hair
Hair should be about 60-70% dry before you start using a dryer. This reduces drying time and heat exposure.
Ⅱ. Using the Wrong Brush
The type of brush you use can drastically affect your results. For straight styles, use a round or paddle brush. For curls, a diffuser and your hands are often the best tools.
Ⅲ. Not Using Heat Protectant
Skipping a heat protectant can lead to significant damage over time, making it a crucial step in your routine.
7. Advanced Techniques for Professional Results
For those looking to achieve salon-quality results at home, mastering these advanced techniques can elevate your styling.
Ⅰ. Sectioning for Precision
Working in small sections allows you to focus on each part of your hair, ensuring even drying and styling.
Ⅱ. Brush Rolling Technique
To create loose waves or curls with a hair dryer, use a round brush and roll your hair around it while applying heat. Hold for a few seconds, then release.
Ⅲ. Pin Curls for Volume
After drying each section, roll it up into a pin curl and secure it with a clip. Allow it to cool before releasing for added volume and bounce.
8. Special Considerations for Different Hair Types
Different hair types require tailored drying methods to achieve the best results.
Ⅰ. Fine Hair
Use low heat settings to avoid breakage.
Focus on the roots to create volume without over-drying the ends.
Ⅱ. Thick Hair
Use a higher heat setting for faster drying.
Section hair thoroughly to ensure even drying.
Ⅲ. Curly Hair
Always use a diffuser to maintain curl definition.
Dry with cool air to reduce frizz and preserve natural texture.
9. Troubleshooting Common Issues
Sometimes, despite your best efforts, things might not turn out as planned. Here’s how to address some common hair drying problems.
Ⅰ. Frizz
If your hair ends up frizzy after drying, it could be due to high heat, a lack of heat protectant, or drying too quickly. Use a serum and consider drying on a lower heat setting next time.
Ⅱ. Lack of Volume
If your hair looks flat, you may need to focus more on drying the roots with your head upside down. A volumizing product can also help.
Ⅲ. Uneven Drying
If some areas are still damp while others are dry, ensure you’re working in smaller sections and moving the dryer consistently.
10. Maintaining Your Hair Dryer
A well-maintained hair dryer not only lasts longer but also ensures consistent performance.
Ⅰ. Cleaning the Filter
Hair dryers accumulate lint and dust in their filters. Clean this out regularly to maintain airflow and prevent overheating.
Ⅱ. Checking the Cord
Inspect the power cord for any signs of wear or damage. A frayed cord can be a safety hazard and should be replaced immediately.
Ⅲ. Proper Storage
Store your hair dryer in a cool, dry place. Avoid wrapping the cord tightly around the dryer as this can cause wear over time.
Conclusion
Mastering the art of using a hair dryer goes beyond just drying your hair. With the right techniques, tools, and care, you can achieve salon-quality results at home while keeping your hair healthy and strong. By following the tips and methods outlined in this guide, you’ll be well on your way to becoming a hair-drying expert.


